Choosing the Artwork Theme
When it came to designing my cabinet artwork, I knew I didn’t want to base it on a single table. This cabinet can play hundreds of different tables, so I wanted the artwork to reflect the variety of virtual pinball as a whole. My previous cabinet was plain black. It had a clean, minimalist look, but for this full-size build I wanted something that would really stand out. It needed personality.
I spent hours browsing images online for inspiration. A few designs caught my eye, but nothing felt right. Most pinball artwork sites had similar themes and layouts. I wanted something original. One thing that especially bothered me was how often the opposite side panel was simply a mirrored version of the first. While I understand why it’s done, mirrored text and logos appear backwards and, in my opinion, look odd up close. I decided to use the ideas I liked as inspiration and create something completely my own.
Since I was already ordering my cabinet from Tukkari, I chose to use their artwork printing service. Their pricing is very competitive, and they provide cabinet template files that make it easy to design artwork in whatever software you prefer.
Designing the Artwork
I used GIMP, a free cross-platform image editor comparable in power to Photoshop. I’ve used GIMP for other projects, so I was comfortable working in it.
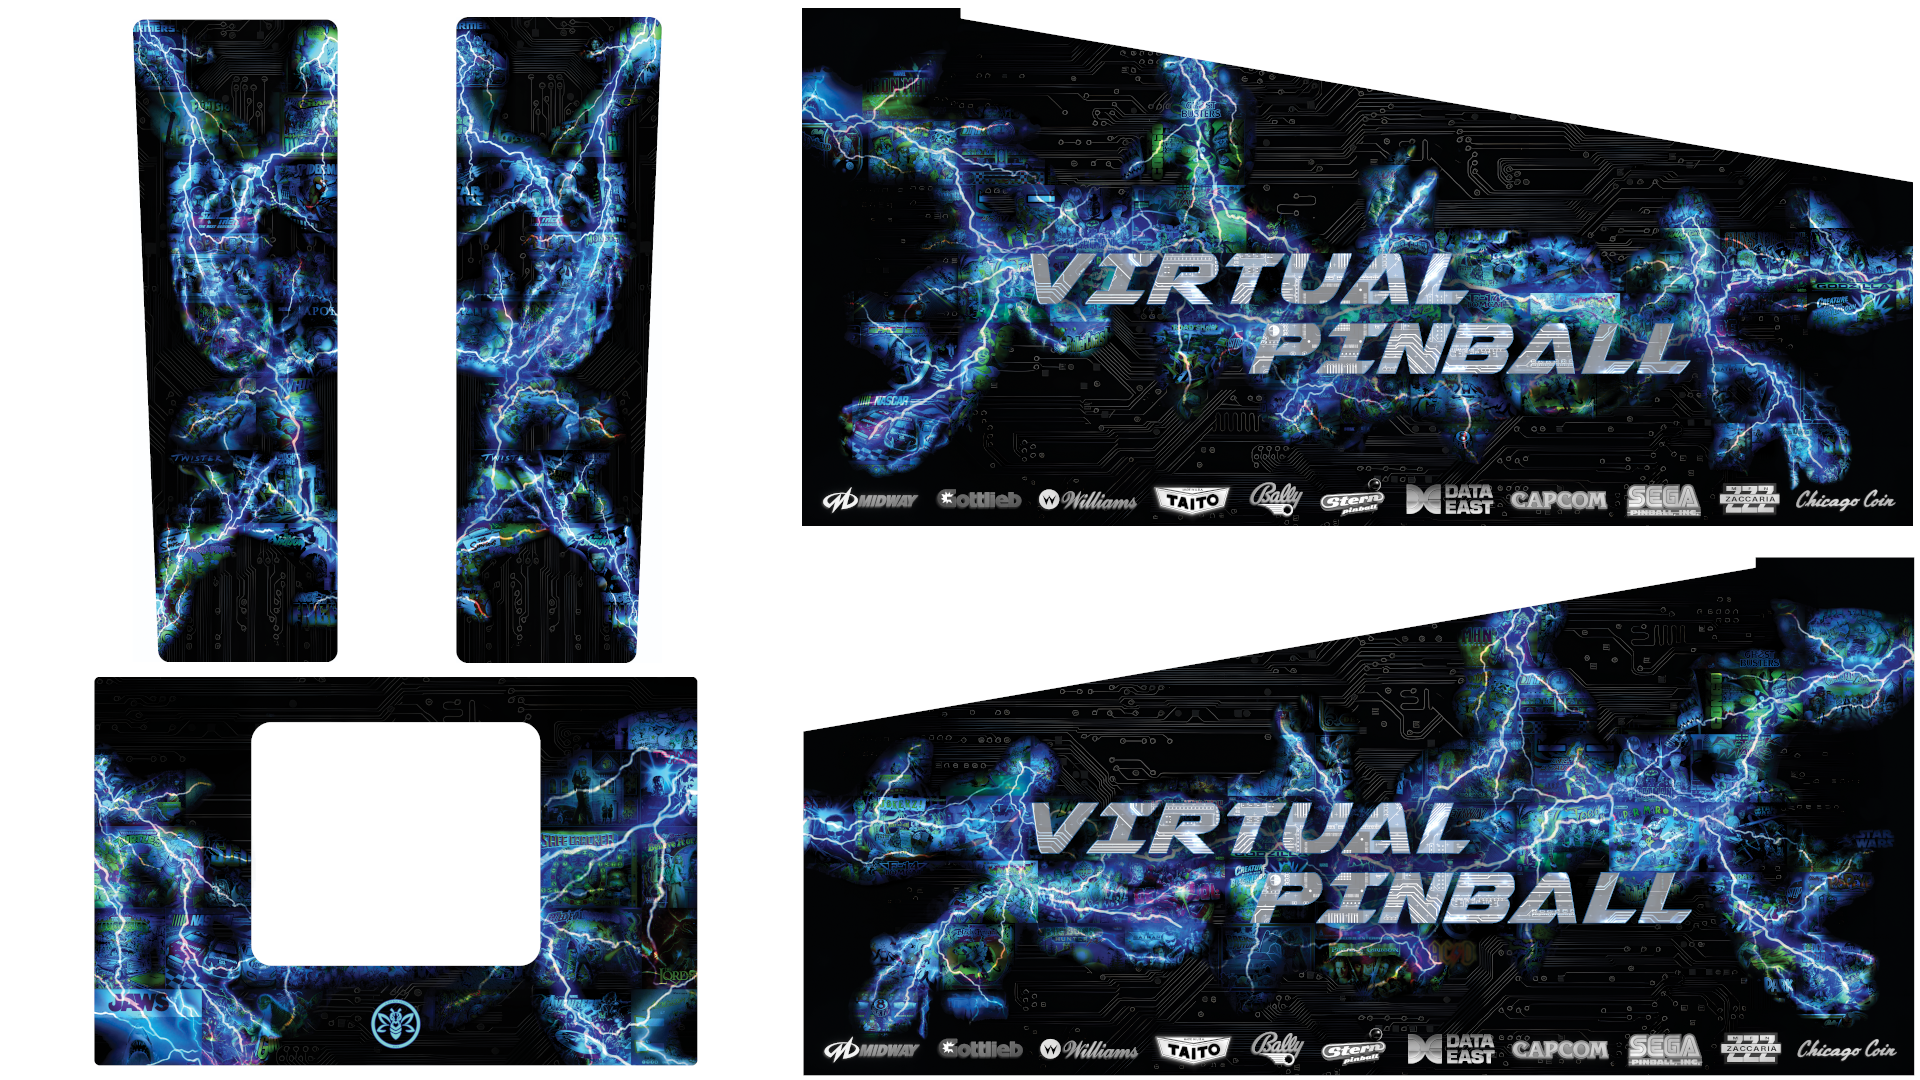
From the start, I wanted the art to represent the “virtual” side of pinball—the technology and components inside the cabinet. I found images of a circuit board and a CPU and began experimenting with them in GIMP.
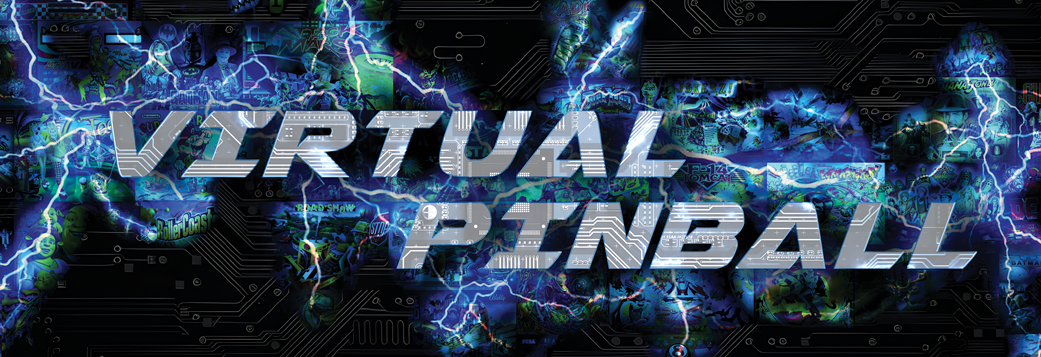
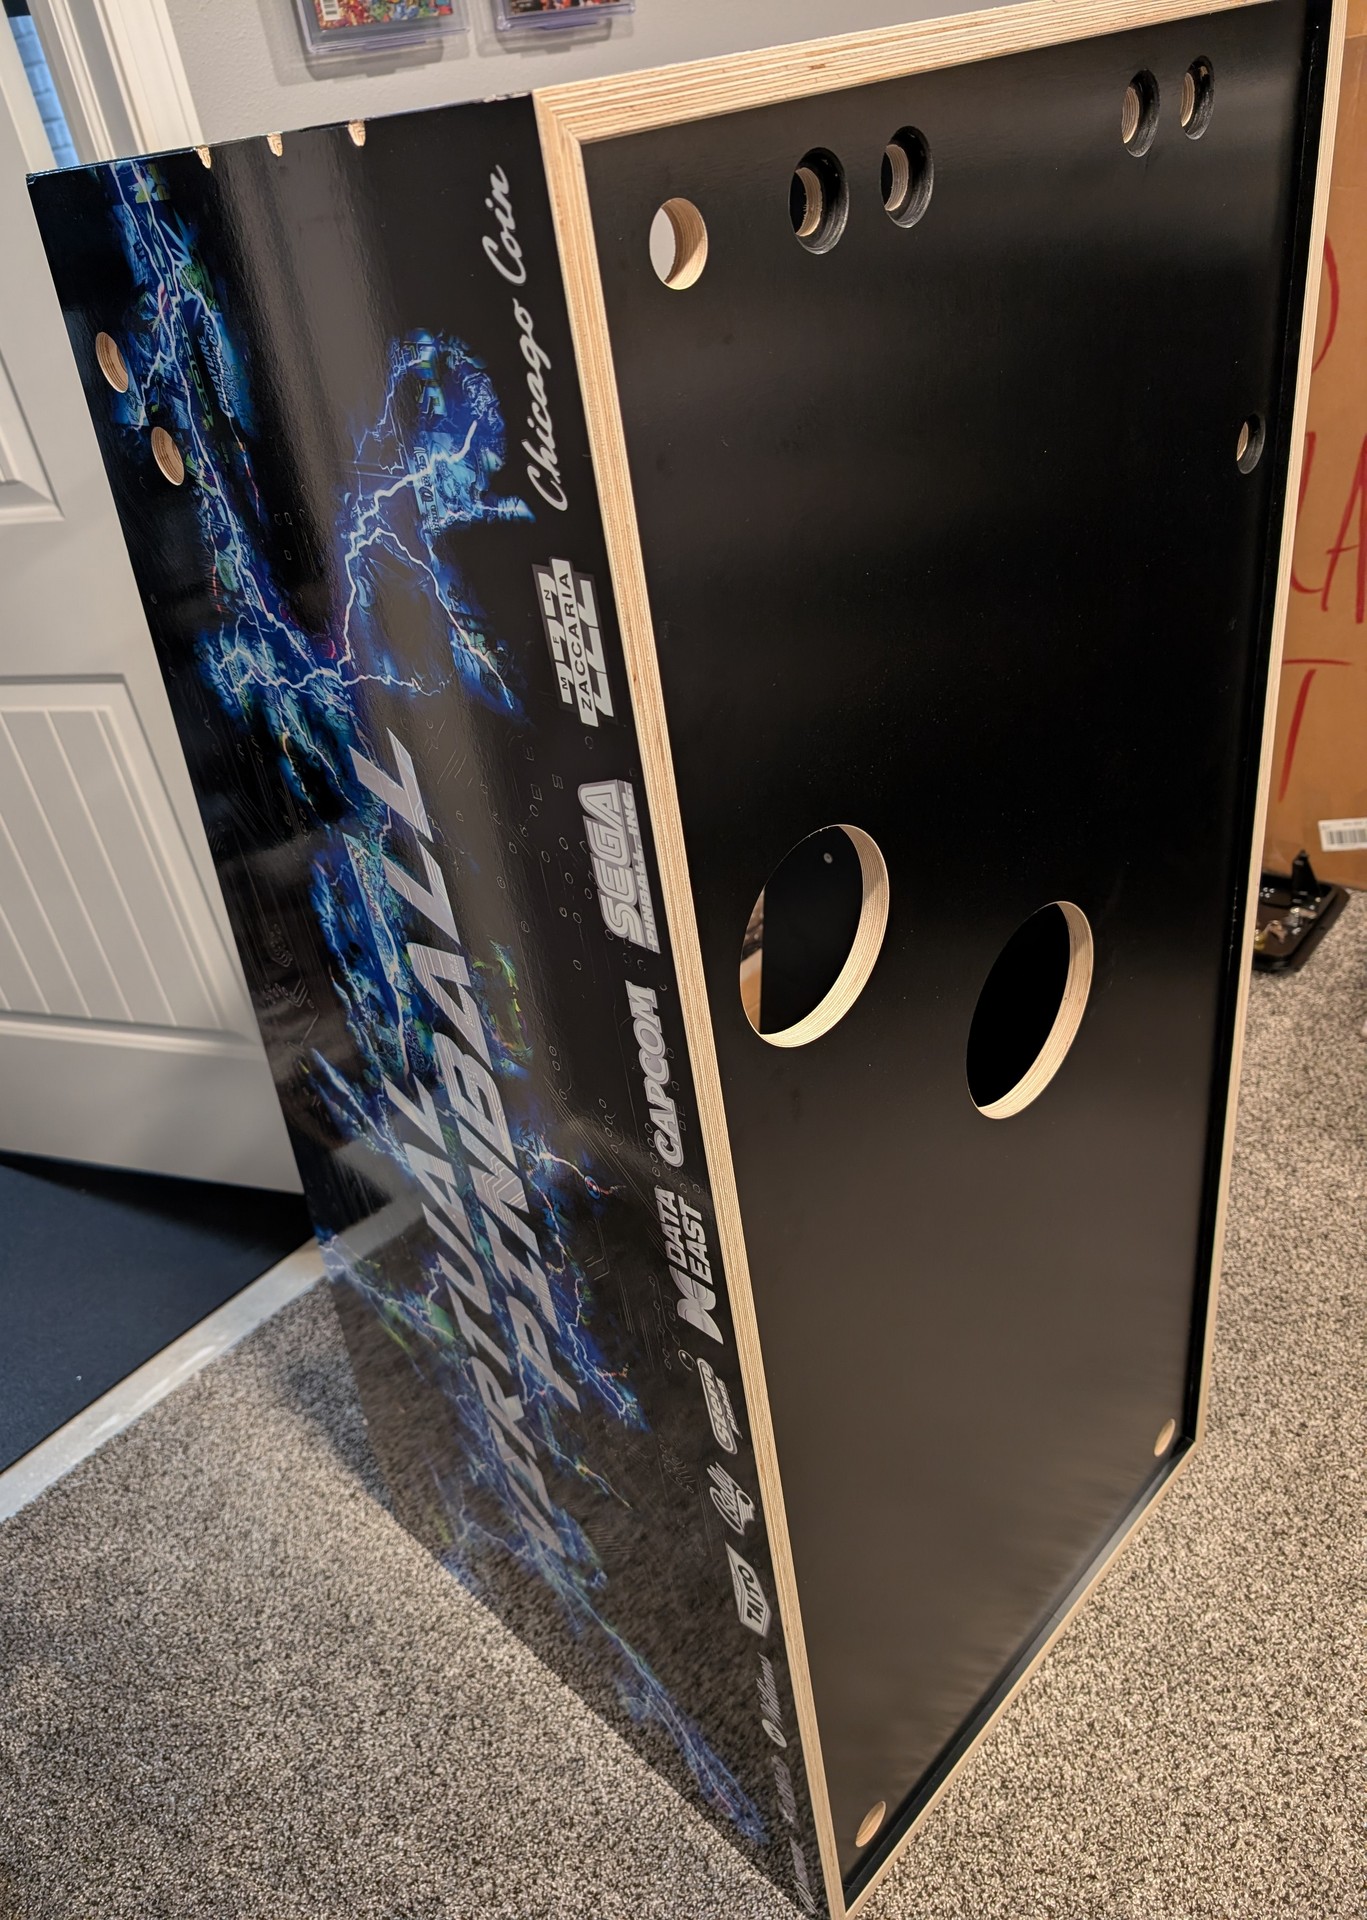
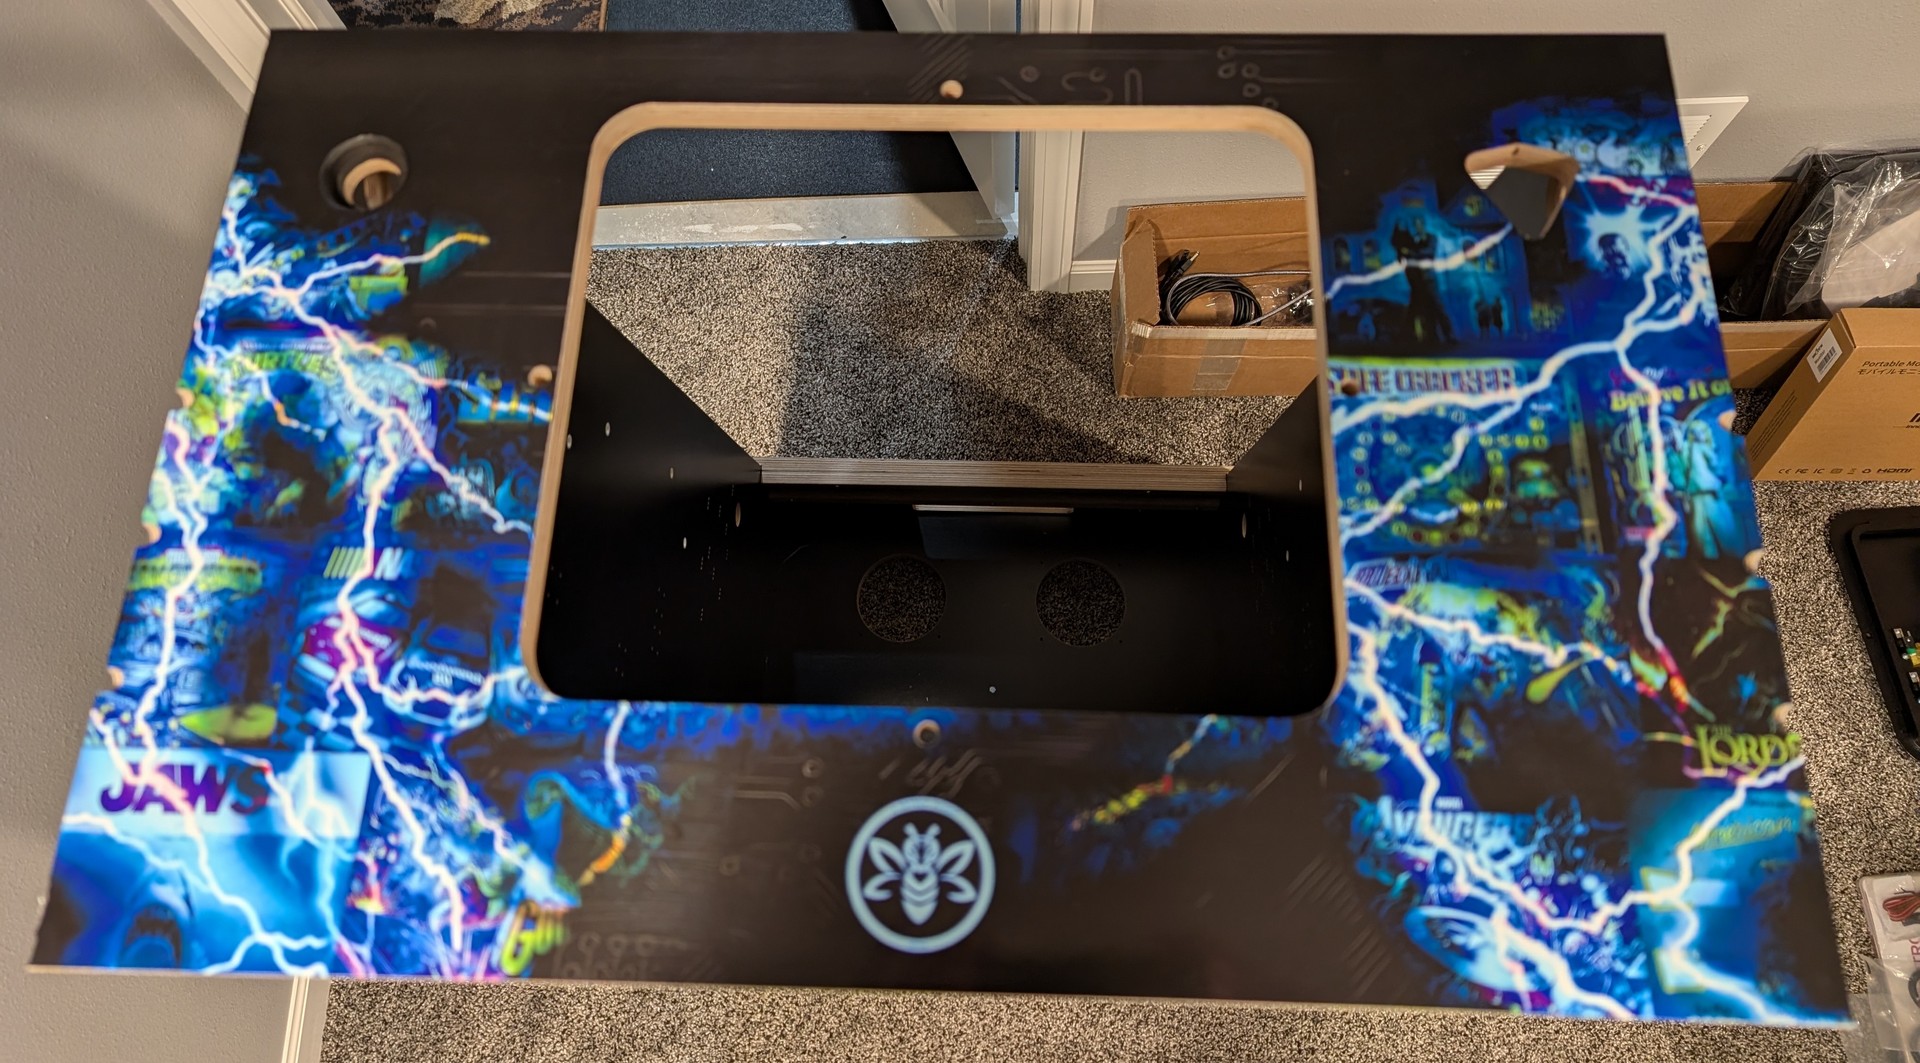
I had seen some cabinets featuring lightning effects and really liked that look. I wondered if I could use lightning to reveal the “guts” of the machine—the internal computer components. After trying several approaches, I had another idea while browsing the Virtual Pinball Spreadsheet (an excellent VPin resource): what if I incorporated backglass images from some of my favorite tables into the lightning itself?
From there, I started building different layouts. After many hours of refining and rearranging, I landed on my final design.
The finished concept captured everything I wanted:
-
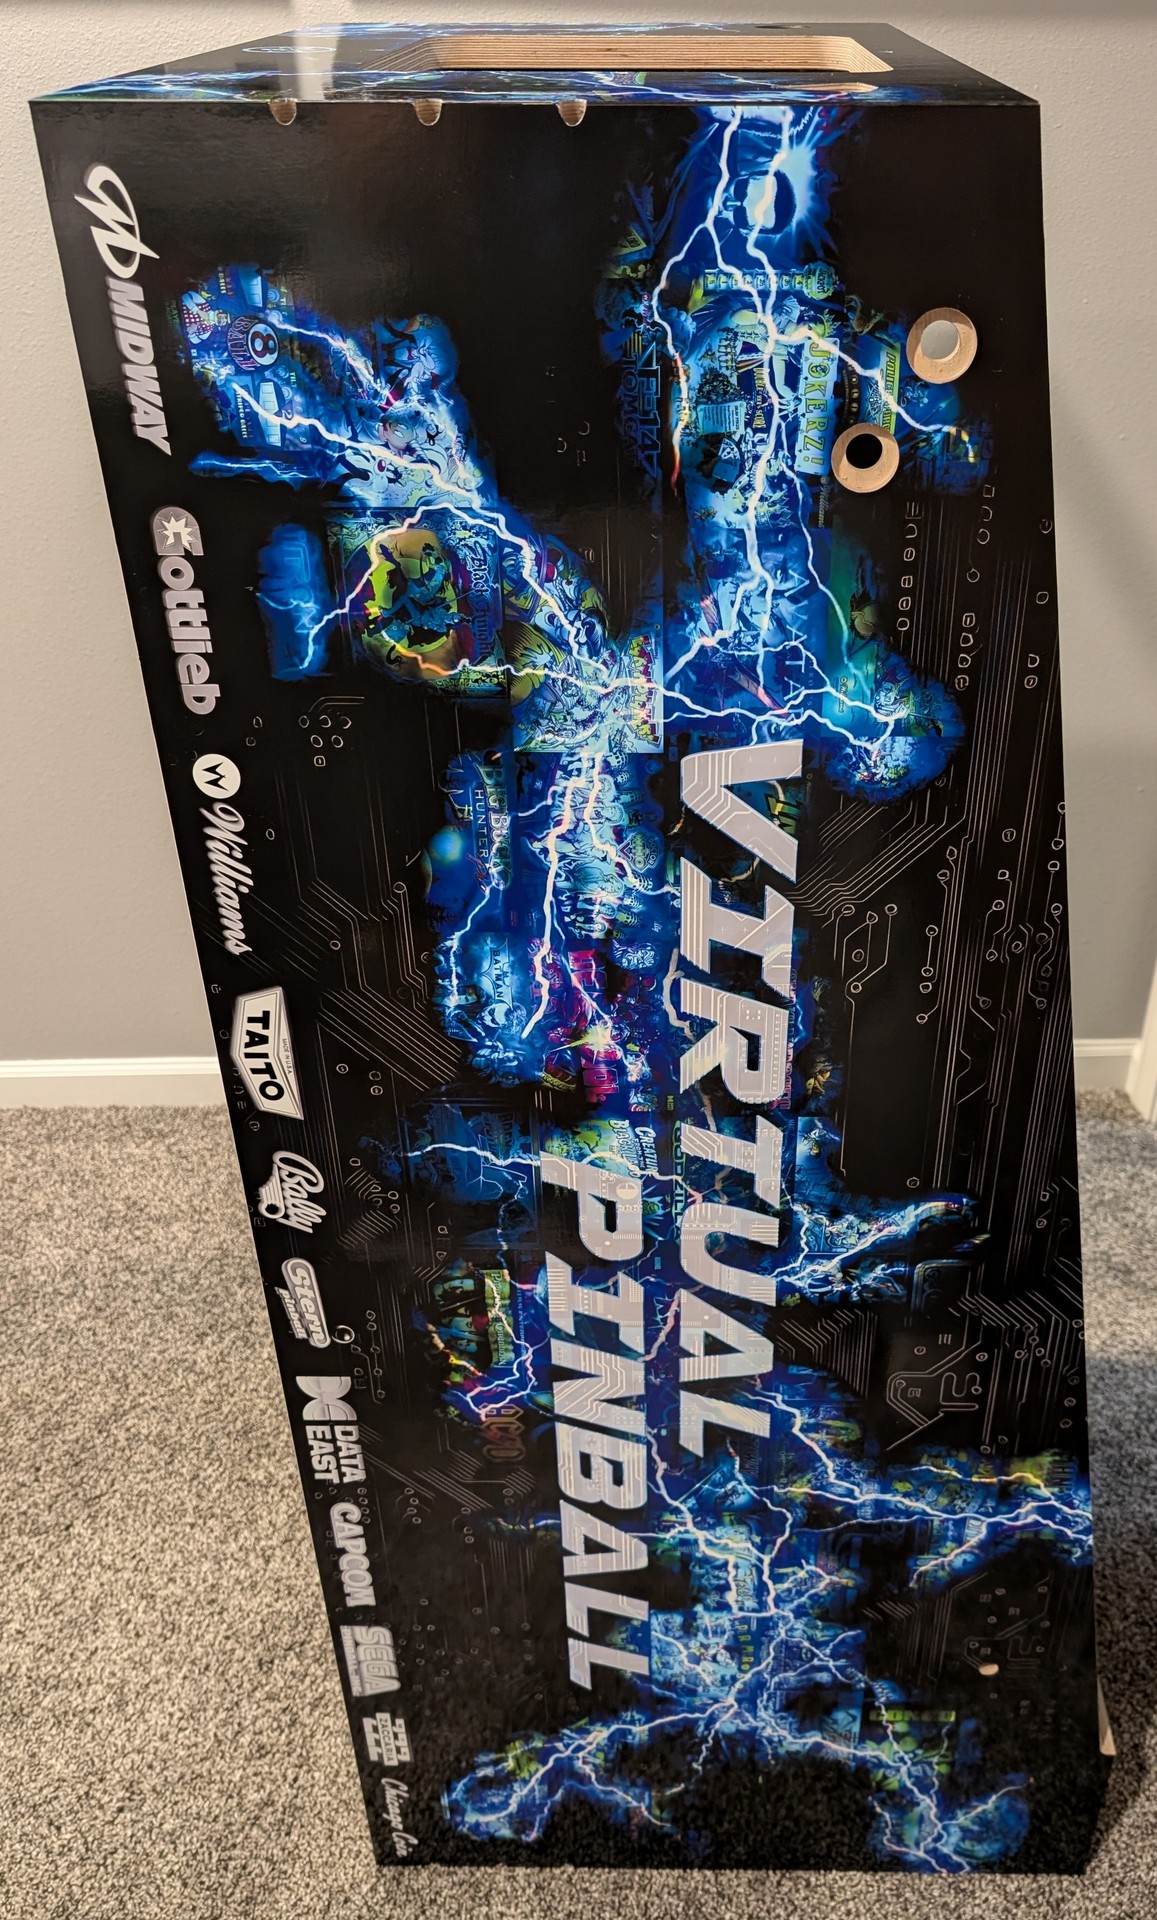
The lightning bolts reveal flashes of multiple pinball table backglasses, representing the variety of virtual pinball.
-
The background resembles a circuit board.
-
The text elements highlight the “brain” of the cabinet—the CPU powering the experience.
Submitting the Artwork
I submitted my files via WeTransfer, as recommended by Tukkari. When preparing artwork for print, make sure your files are at least 300 DPI and in CMYK format. I had to do a bit of research to convert everything properly, but the process wasn’t too difficult. I uploaded five files without issue.
Jan, the owner of Tukkari, contacted me through Facebook and explained that my artwork might print darker than it appeared on screen. Since monitors are backlit, they make images appear brighter than they will in print. I adjusted the brightness slightly and resubmitted.
Jan even ran a test print of one of my backbox side panels to ensure the fine details would show and that the artwork wouldn’t be too dark. He sent photos confirming everything looked great.
Applying the Artwork
Once the cabinet body was complete, I was ready to apply the artwork so I could move on to installing the legs and siderails.
The artwork arrived rolled inside the shipment crate. A quick word of caution: take your time when removing the tape holding the roll together. I chose to cut the tape instead of peeling it slowly and accidentally nicked the edge of one side piece. Thankfully, Tukkari includes about 1/8 inch of extra material around the edges for trimming, so the damage didn’t affect the final result.
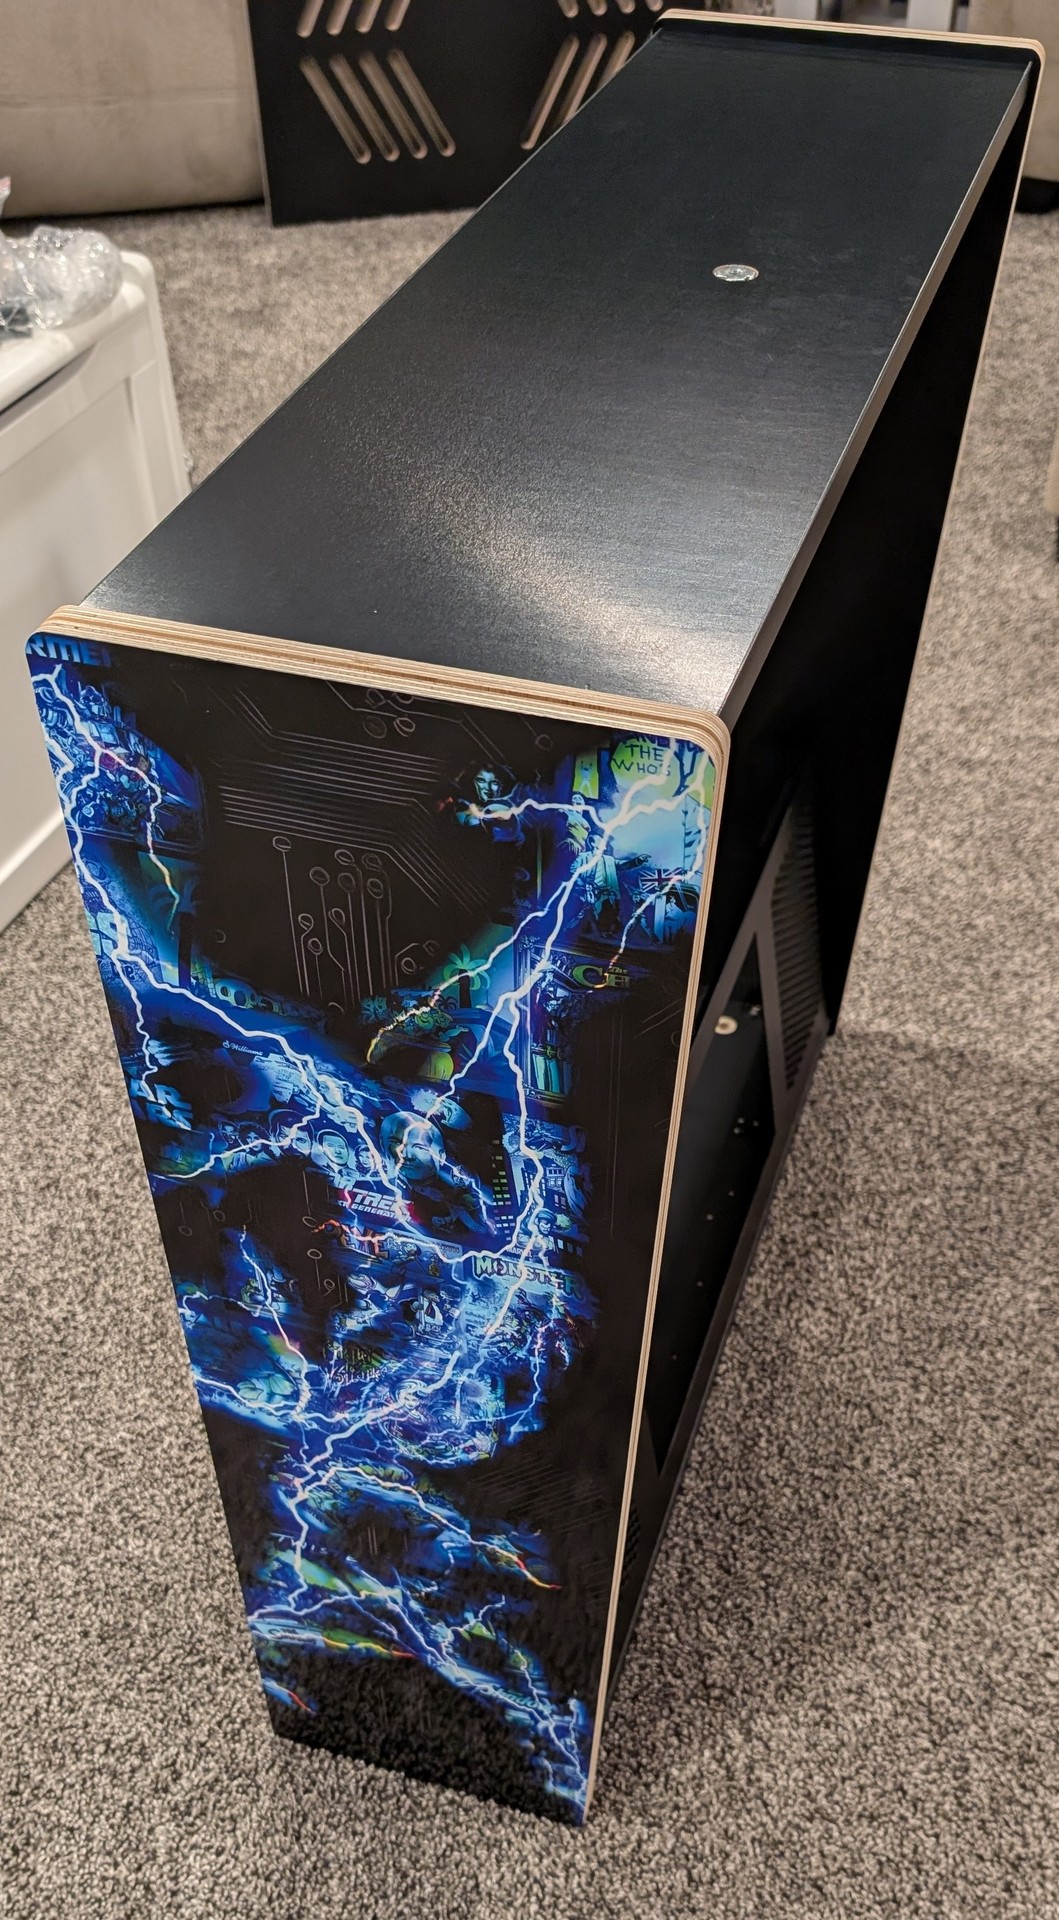
Tukkari’s print quality is outstanding. They apply a clear gloss coat and then hot laminate the surface for added protection. The detail is incredible, and the gloss almost gives the artwork a subtle texture. Photos truly don’t do it justice.
Because the prints were rolled during shipping, I laid them flat and placed a yoga mat with some weights on top to help flatten them out. After about four hours, they were ready to apply. The material feels thick and high quality—not cheap or flimsy.
Backbox Application
I started with the backbox to get comfortable with the process. The material uses Rapid Air (RA) technology, which allows air bubbles to be gently pressed out during application. It really works.
For installation, I used small wood clamps (I bought a pack of six but only needed two). Before applying the vinyl, I cleaned the cabinet surface with isopropyl alcohol and a microfiber cloth to remove dust and oils.
I aligned the artwork carefully, secured it with clamps near the center, then peeled back the backing and applied one half at a time. Important: do not use the “wet” application method with this material.
Working in small sections, I used a 4" felt-edge squeegee, moving from the center outward. In very dark areas, I did notice extremely minor scratch marks from the felt edge, but they were barely visible.
Afterward, I used a sharp X-Acto knife to trim the edges. Especially on the backbox, trimming close to the edge is important so the T-molding doesn’t push against the artwork. Use a fresh blade and take your time for clean cuts.
Main Cabinet Body
I followed the same process for the main cabinet body. The only thing I would change is applying the front artwork first. I had designed the graphics to visually wrap around the cabinet, and starting with the front would have made alignment slightly easier. Fortunately, everything lined up well in the end.
Before installing the front panel artwork, I used a black oil-based paint marker to color the start button exposed wood cutout. I repeated this on the undercab buttons, however this is completely optional since they will not be visible.
With the artwork fully applied, the cabinet finally began to look complete. The final touch was using an oil-based paint marker to seal the edges where the artwork meets the corners. It’s a small detail, but it makes a big difference and gives the cabinet a clean, finished appearance.
Next up in the build process: installing the legs.